

Celebrate Your Story on Canvas – One Memory at a Time
Whether it's a milestone, a memory, or a simple joy, we’re here to make it a lasting part of your home.
-

Add Photos
-

We Deliver
-

You Stick


Or Select From Our Wide Range of Collections
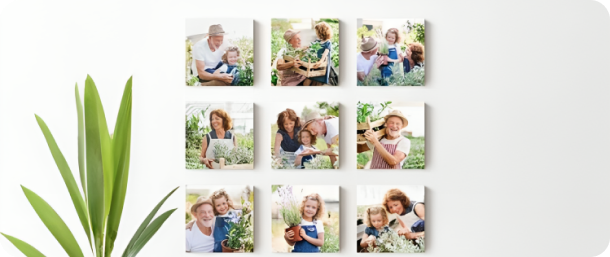
Turn your favorite phone pics into prints that stick and restick.
They’re removeable, reusable, and leave no marks.
How it Works
-

1
Upload a photo or choose from our canvas
-
2
The art is printed and shipped to you

Happiness Guaranteed

Reviews That Made Our Day
Up to 40% off + Free Shipping
“I was impressed with the quality of the canvas prints from Prints4Sure. The colors are vibrant, and the image clarity is excellent—true to what I uploaded. The materials feel durable, and they arrived in perfect condition.”

“I love that I can rearrange them without damaging my walls, and they’re perfect for renters or anyone looking for a hassle-free personal story décor solution. They adhere well and are easy to reposition."
“I wanted to create a keepsake for my grandparents’ 50th wedding anniversary. I uploaded a photo from their wedding day and added one from a recent family gathering for a ‘Then and Now’ theme. The detail was beautiful, and it was so clear despite the older photo."
“I recently got married, and my husband and I ordered a large canvas of our favorite wedding photo from Prints4Sure. When it arrived, I almost cried—everything looked stunning, from the clarity of our faces to the warmth of the colors."

-

Rated 4.9 on the Appstore
Based on 80,000+ Reviews
-

-

Rated Excellent on Trustpilot
Based on 10,000+ Reviews


Create Professional Looking Canvas Art Prints Right at Home
Canvas art prints have a way of transforming any room from an ordinary living space into something that feels curated, intentional, and deeply personal. For years, people assumed that getting gallery-quality canvas prints meant spending significant money at a print shop or ordering from an online service and waiting days for delivery. The truth is that with the right tools, materials, and a bit of patience, you can produce stunning canvas prints from the comfort of your own home. Whether you are a photographer wanting to display your best shots or someone who simply wants unique wall art on a budget, home canvas printing is more accessible than ever before.
The home printing market has grown enormously in recent years, and this growth has brought professional-grade materials and techniques within reach of everyday people. Affordable canvas rolls, gesso primers, stretcher bars, and high-resolution inkjet printers have all become widely available through art supply stores and online retailers. Once you understand the process from start to finish, you will realize that the gap between a print made at home and one produced at a professional studio is surprisingly small. This article walks you through every step of that process in detail.
Choosing Your Ideal Canvas
The foundation of any great canvas print is the canvas itself, and not all canvas materials are created equal. When shopping for canvas, you will encounter two primary types: cotton and polyester. Cotton canvas has a natural texture that absorbs ink beautifully and gives prints a warm, organic feel that many artists and photographers prefer. Polyester canvas, on the other hand, tends to be more resistant to moisture and UV damage, which makes it a practical choice if you plan to hang your print in a room with high humidity or direct sunlight exposure.
Thread count also matters more than most beginners realize. A tighter weave with a higher thread count produces a smoother surface that renders fine details with greater clarity. Looser weaves can add a painterly texture to images, which looks wonderful for landscape photos or digital artwork but may obscure sharp details in portrait photography. When in doubt, start with a medium-weight cotton canvas with a thread count between 300 and 400 for a versatile surface that works well with most image types.
Picking the Right Printer
Your printer is arguably the most important piece of equipment in the entire home canvas printing process. Standard office inkjet printers can technically print on canvas, but the results rarely match what a dedicated photo or art printer can deliver. For home canvas printing, you want a printer with at least six ink cartridges, since the wider color gamut produced by six or more inks allows for smoother gradients, more accurate skin tones, and richer blacks.
Pigment-based inks are strongly preferred over dye-based inks for canvas printing. Pigment inks sit on top of the canvas fibers rather than being absorbed into them, which results in sharper lines and significantly better longevity. Prints made with pigment inks can last decades without noticeable fading when properly sealed and displayed away from direct sunlight. Brands like Epson, Canon, and HP all offer wide-format photo printers at various price points that are well suited to canvas work, and investing in one of these will pay off quickly if you plan to print regularly.
Preparing Your Digital Image
No matter how good your printer and canvas are, a low-quality image will produce a disappointing result. Before you print anything, you need to make sure your digital file is properly prepared. Resolution is the first thing to check. For canvas prints, you generally want a minimum of 150 dots per inch at the final print size, though 200 to 300 dots per inch will give you noticeably sharper results. If you are printing a large format canvas, be especially careful here because scaling up a small image will reveal pixelation and blurriness that are barely visible on a small screen.
Color profile management is the second critical aspect of image preparation. Most digital photos are saved in the sRGB color space, which is fine for screen display but can produce dull or inaccurate colors when printed. If your printer supports it, converting your image to the Adobe RGB color space before printing will give you access to a wider range of colors and more accurate tones. Software like Adobe Photoshop, Lightroom, or even free alternatives like GIMP allow you to make this conversion and do final color adjustments before you send the file to print.
Applying Canvas Coating Properly
Before you can print directly onto raw canvas, the surface needs to be primed or coated to accept the ink properly. Uncoated canvas fibers will absorb ink unevenly, causing colors to bleed, fade, or appear muddy. There are two main ways to prepare your canvas for printing. The first is to purchase pre-coated inkjet canvas, which comes with a factory-applied coating designed specifically for inkjet printers. This is the easiest option for beginners and produces very consistent results.
The second approach is to apply a canvas coating yourself using a product like gesso or a dedicated inkjet canvas coating spray. If you go this route, apply the coating in thin, even layers using a wide foam roller or a flat brush, and allow each layer to dry completely before applying the next. Most canvas prints benefit from two to three coats, lightly sanding between applications with fine-grit sandpaper to remove any texture irregularities. Once the final coat is dry, your canvas is ready for printing and will accept ink with the same quality as a professionally coated surface.
Setting Up Print Software
Getting the most out of your printer requires spending some time in the print settings before you send any job to the machine. The most important settings to configure are the paper type, print quality, and color management options. Set the paper type to canvas or matte fine art paper if your printer offers that option, since this tells the printer how much ink to deposit and at what speed to move the print head. Sending too much ink too quickly onto canvas causes pooling and bleeding that ruins the print.
Print quality should always be set to the highest available option when doing canvas work. While this significantly increases print time, the difference in output quality is well worth the wait. For color management, choose to let the printer handle the color conversion if you have installed the correct ICC profile for your specific canvas and printer combination, or choose to have your editing software manage colors if you prefer more manual control. Either approach can work well as long as you are consistent and do not try to have both the software and the printer apply color profiles at the same time, which causes a double-conversion error.
Stretching Canvas Over Frames
Once your image is printed and the ink has dried completely, the next step is stretching the canvas over a wooden stretcher frame. Stretcher bars are the interlocking wooden strips that form the frame your canvas will be pulled tightly across. You can purchase stretcher bar kits in a wide range of sizes from art supply stores, and they are designed to slot together without any tools or adhesives. Assemble the frame on a flat surface and make sure all four corners are perfectly square before you begin stretching.
Place the printed canvas face down on a clean, soft surface and center the assembled frame on top of it. Working from the center of each side outward, use canvas pliers to grip the canvas edge and pull it firmly over the back of the frame, securing it with a staple gun as you go. The key to a smooth, wrinkle-free result is to work in a crossing pattern, pulling and stapling the top, then the bottom, then the left side, then the right side, and continuing to alternate until you reach the corners. Fold the corners neatly like wrapping a gift before stapling them down for a clean, professional finish.
Getting Colors to Look Accurate
One of the most common frustrations beginners face with home canvas printing is that colors on the finished print do not match what they saw on their monitor. This color shift happens because monitors and printers use fundamentally different methods to reproduce color, and without calibration, the two rarely agree. The best solution is to calibrate your monitor using a hardware colorimeter, which measures the actual colors your screen produces and creates a custom profile that compensates for any inaccuracies. This small investment makes a dramatic difference in color accuracy.
On the printer side, using the correct ICC profile for your specific canvas and printer combination is equally important. ICC profiles are small files that tell your printer exactly how to reproduce each color on a particular paper or canvas surface. Many canvas manufacturers provide free ICC profiles on their websites that you can download and install. Once installed, you select the profile in your print settings and your printer will adjust its ink output to match the colors in your image as accurately as possible on that specific canvas.
Sealing Prints for Longevity
After stretching your canvas, applying a protective coating is one of the most important steps you can take to preserve the quality of your print over time. Canvas varnish comes in several finishes including matte, satin, and gloss, and the choice between them comes down to personal preference and where the print will be displayed. Glossy varnish makes colors appear more vibrant and saturated, while matte varnish gives the print a softer, more fine-art appearance that reduces glare in brightly lit rooms.
Apply the varnish using a wide, soft brush or a foam roller in long, even strokes, working in one direction to avoid creating visible brush marks. Two thin coats are always better than one thick coat, as thick applications can cause the varnish to crack or peel as it dries. Allow the first coat to dry for at least two hours before applying the second. Once fully cured, the varnish layer protects the ink from UV light, moisture, and dust, significantly extending the life of your print and keeping colors looking fresh for many years.
Fixing Common Printing Problems
Even experienced home printers encounter problems from time to time, and knowing how to troubleshoot them saves a great deal of frustration. Banding, which appears as faint horizontal lines running across the print, is one of the most common issues and is almost always caused by clogged print head nozzles. Running the printer's built-in nozzle check and cleaning utility usually resolves this within one or two cleaning cycles. If the banding persists after multiple cleaning cycles, manually cleaning the print head with a lint-free cloth and the appropriate cleaning solution may be necessary.
Color casts, where the entire print appears slightly too warm, too cool, or shifted toward a particular hue, are usually caused by incorrect color profile settings or a monitor that is not properly calibrated. Double-check that you have selected the correct ICC profile for your canvas and that color management is not being applied twice. Ink bleeding or feathering at the edges of fine details typically indicates that the canvas coating is too thin or uneven, or that the ink density setting is too high for the canvas surface. Reducing ink density in the printer settings or applying an additional coat of primer to the canvas usually solves this.
Hanging Art the Right Way
A beautifully printed and stretched canvas deserves to be hung with care and precision. The height at which you hang wall art has a significant impact on how it reads in a room. The standard guideline used by professional gallery curators is to hang the center of the artwork at approximately 57 to 60 inches from the floor, which corresponds roughly to average eye level. This height feels natural and comfortable when viewing art while standing and prevents the common mistake of hanging pieces too high on the wall.
For larger canvases or statement pieces that will be viewed from across the room, using two wall hooks instead of one provides better stability and keeps the canvas from tilting over time. Make sure to find the wall studs when hanging heavier canvases, or use appropriate wall anchors rated for the weight of the piece if studs are not in the right location. A level is an essential tool for getting your canvas perfectly straight, and spending two minutes checking alignment before driving the final nail into the wall will save you from having to patch holes and rehang later.
Lighting Your Wall Pieces
The way you light a canvas print can make as much difference to its visual impact as the image itself. Natural daylight is ideal for viewing art because it contains the full spectrum of light and renders colors most accurately. Positioning canvas prints on walls that receive indirect natural light, such as the wall perpendicular to a window rather than directly opposite it, prevents harsh glare and uneven illumination that can make a print look flat.
For artificial lighting, warm-toned LED track lights or picture lights mounted directly to the canvas frame are popular choices in both gallery settings and residential interiors. Avoid placing canvas prints directly under fluorescent lighting, which casts a cool, unflattering light that shifts colors toward green or blue. If you have spotlights on a track or rail system, angle them so the beam hits the canvas at about a 30-degree angle from the ceiling, which creates a gentle wash of light across the surface without producing a hot spot in the center.
Printing Black and White Images
Black and white photography printed on canvas has a timeless, classic quality that works in virtually any interior style. However, getting truly neutral black and white tones from a color inkjet printer requires some additional attention to settings and technique. The most common problem is a color cast in what should be neutral grey tones, where shadows take on a slight green or magenta tint depending on the printer and ink combination used.
The simplest solution is to use a printer driver setting specifically designed for black and white output, which many modern photo printers include. This setting uses all of the printer's ink cartridges in carefully balanced proportions to produce neutral, smooth grayscale tones without visible color casts. Alternatively, converting your image to black and white using the channel mixer in Photoshop and printing it as a color file gives you fine control over how different original colors translate into shades of grey, which allows you to emphasize tonal contrast and create prints with deep, rich blacks and clean highlights.
Budget-Friendly Material Sources
Building a home canvas printing setup does not have to be expensive if you know where to look for supplies. Canvas rolls rather than pre-cut sheets offer significantly better value for money, especially if you plan to print multiple pieces in various sizes. A single roll of good-quality inkjet canvas can yield dozens of prints, and the per-print cost drops dramatically compared to buying individual sheets. Online art supply retailers frequently offer discounts on bulk canvas roll purchases, and comparing prices between several suppliers before buying is always worth the effort.
Stretcher bars can also be purchased economically by buying them in bulk or during seasonal sales at art supply stores. Some home printers even make their own stretcher frames from pine strips purchased at a hardware store, cutting and sanding the wood to size and using metal corner brackets to hold the joints square. This approach takes more time and basic woodworking skill, but reduces the cost of the frame component significantly. Ink is usually the ongoing cost that adds up most quickly, so investing in a printer that uses individual cartridges for each color is important because you only replace the color that runs out rather than replacing an entire multi-color unit.
Displaying Multiple Canvas Pieces
A single canvas print can be a powerful focal point, but arranging multiple prints together as a gallery wall creates an entirely different kind of visual impact. The key to a successful multi-canvas arrangement is planning the layout on the floor before committing to any holes in the wall. Lay all of your pieces out on the floor and experiment with different arrangements until you find a composition that feels balanced and intentional. Photograph the arrangement from directly above so you have a reference image to guide the installation.
When hanging multiple canvases together, consistent spacing between pieces is important for a cohesive result. A gap of two to three inches between individual canvases feels tight and gallery-like, while gaps of four to six inches give each piece more visual breathing room and a more relaxed, residential feel. Using painter's tape to mark the positions of each canvas on the wall before drilling any holes is a practical trick that allows you to see the full arrangement at actual scale and make any adjustments without damage. Matching the visual weight of pieces across the arrangement, rather than grouping all the large pieces on one side, keeps the gallery wall feeling balanced.
Storing Unused Printed Canvas
If you print canvases in advance or have leftover prints that are not yet stretched, storing them correctly is essential to preserving their quality until you are ready to display them. The primary enemies of stored canvas prints are moisture, heat, and physical pressure. Never store printed canvas in a damp basement or attic where temperature fluctuates significantly, as these conditions can cause the canvas to warp, the ink to crack, or mold to develop on the surface.
Roll your unstretched prints face outward around a wide tube or cardboard roll with a diameter of at least three inches. Rolling face outward rather than face inward prevents the ink layer from cracking as the canvas is bent around the curve of the roll. Wrap the rolled canvas in acid-free tissue paper or glassine before storing to protect the surface from dust and scratches. Keep stored rolls in a cool, dry location away from direct sunlight, standing them vertically in a tube container or laying them flat in a large flat drawer rather than leaning them at an angle, which can cause the canvas to develop a permanent curve over time.
Advanced Techniques for Texture
Once you are comfortable with the basics of home canvas printing, there are several advanced techniques that can elevate your prints from good to genuinely impressive. Adding a hand-applied texture coat to a finished print is one of the most impactful of these techniques. Using a palette knife or a stiff brush, you can apply a thin layer of acrylic medium over the entire surface of the print after it has been varnished, creating ridges and textures that mimic the surface of an original oil or acrylic painting.
Another technique involves deliberately using the natural grain of a coarser canvas weave as a visual element in the composition. By printing images that have been digitally processed to look like paintings rather than photographs, the visible canvas grain adds to the illusion and makes the finished piece almost indistinguishable from an original work. Some home printers also experiment with applying bold acrylic paint details over specific areas of a print to add highlights, deepen shadows, or introduce colors that were not in the original photograph, blurring the line between print and original artwork in a way that produces unique one-of-a-kind pieces.
Conclusion
Producing professional-looking canvas art prints at home is a genuinely rewarding pursuit that combines technical skill with creative expression. What makes home canvas printing so satisfying is not just the finished product but the entire process of transforming a digital file into a tangible piece of wall art that you made with your own hands. Every step of the process, from choosing the right canvas and preparing your image file to stretching the finished print and hanging it on the wall, gives you opportunities to refine your technique and deepen your understanding of what makes a great print.
As you spend more time with the process, you will naturally develop preferences and routines that suit your particular style of working. Some people prefer the precision of working with pre-coated canvas and careful ICC profile management to achieve perfectly accurate colors. Others enjoy the more experimental side of adding hand-applied textures and mixed-media elements to their prints to create work that feels uniquely personal. Both approaches are valid, and the beauty of working at home rather than in a commercial print shop is that you have complete freedom to follow whichever path interests you most.
The financial savings compared to professional printing services are real and significant, but they are only part of the appeal. Having the ability to print any size, experiment with different finishes, and reprint a piece whenever you want without placing a new order gives you a level of creative control that no external service can match. You can print a test version on a small piece of canvas, evaluate the colors and composition in person, make adjustments, and reprint the final version all within a single afternoon. This immediacy and flexibility changes the way you think about wall art in your home.
It is also worth acknowledging that home canvas printing is a skill that takes time to develop fully. Your first few prints may not be perfect, and that is completely normal. Keep notes on what settings you used for each print, what worked, and what you would change next time. This habit of reflection and documentation accelerates your progress more than any single tutorial or tip sheet could. Over time, your eye for color accuracy will sharpen, your stretching technique will become smoother and faster, and you will build up a mental library of solutions to common problems that lets you troubleshoot confidently.
The world of home canvas printing is one where patience, curiosity, and a willingness to learn from each print combine to produce results that genuinely rival those of professional services. Start with one print, learn from it, and let that experience guide your next one. Before long, your walls will tell a visual story that is entirely your own, told in the medium of canvas and ink that you shaped from beginning to end.